Property boundaries
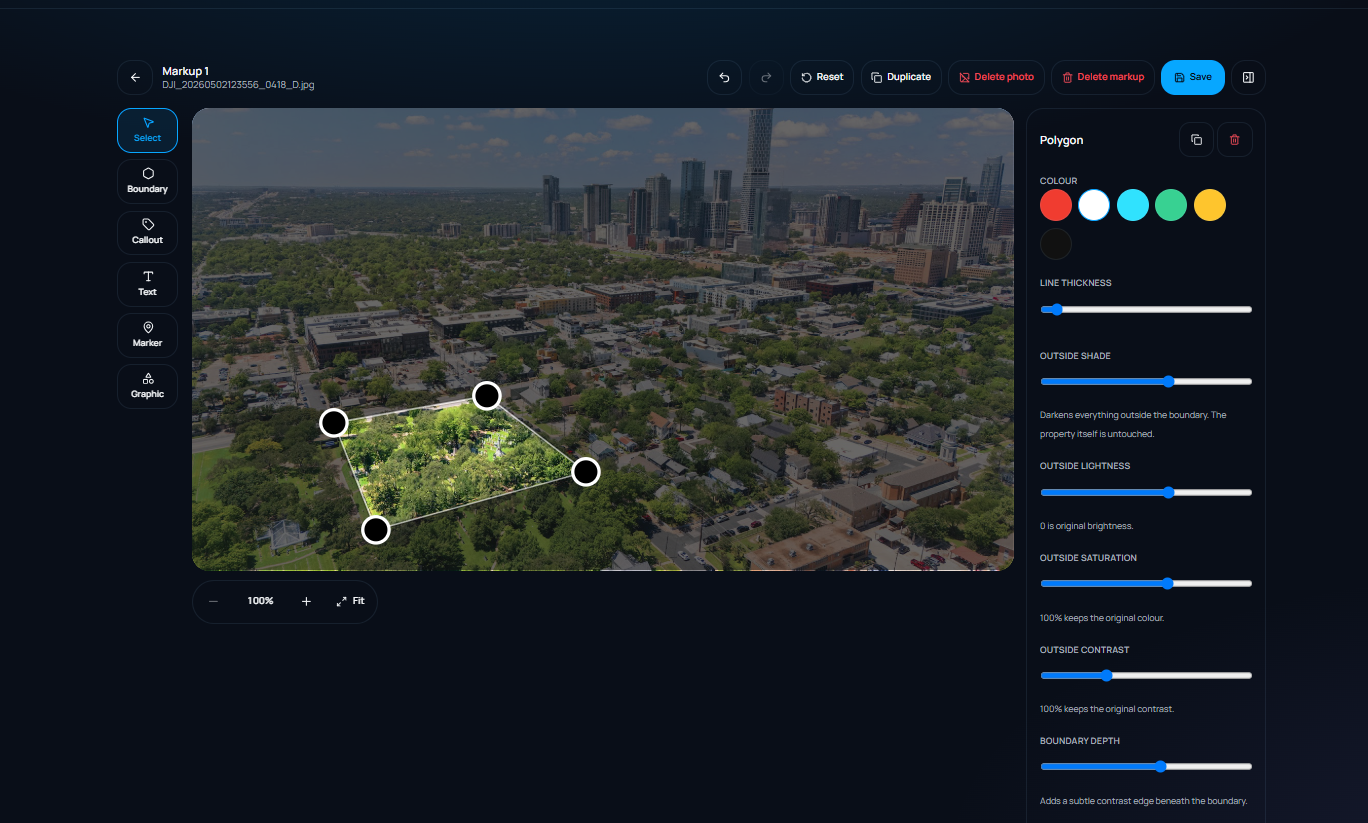
Draw and adjust a property outline directly over an aerial final, with controls for the boundary and the area outside it.
Post-delivery tools
After your edited images arrive in RELMX, keep working with them in the same project. Add boundaries, callouts, labels, markers and graphics without sending the final through a disconnected design workflow.
After delivery
Markup turns a finished image into an informative visual for the listing, the agent and the client.
The source is the final image already attached to the RELMX project. Open it, add the information the photograph alone cannot communicate, and keep the result with the property instead of moving files and notes between disconnected tools.
The workspace is intentionally focused on real estate presentation. It provides the visual layers needed to explain a property clearly while preserving the delivered image and the editable markup composition.
The tools
Use the existing markup tools individually or combine them into one clear presentation asset.
Draw and adjust a property outline directly over an aerial final, with controls for the boundary and the area outside it.
Connect a clear label to a precise point so buyers can identify an amenity, access point, view or nearby feature.
Place concise wording on the image, with an optional background that keeps the label readable over photography.
Pin a specific location and direct attention with the marker treatment built into the markup workspace.
Add approved graphic assets to create a more useful presentation while keeping the composition attached to the final photo.
Arrange, resize and revise markup elements, then save an updated asset without losing the editable composition behind it.
Use cases
Make aerials, exteriors and presentation images more useful without changing what the property is.
Outline the parcel on an aerial image and use outside shading to keep attention on the land being marketed.
Point out an entrance, pool, guest house, trail, dock or other visible property feature with a callout or marker.
Label a visible park, water feature, road or landmark when its location is useful context for the listing.
Combine concise text, markers and graphics into a polished asset for client review and property marketing.
How it works
Your approved final images arrive in the RELMX project where the property and delivery already live.
Choose the delivered photo you want to turn into a more informative marketing asset.
Draw a boundary or add callouts, text, markers and graphics, then adjust their placement and appearance.
Save the finished version so it remains connected to the same project and can be used with the listing media.
Create your RELMX workspace and turn delivered images into clearer, client-ready marketing assets.